Sensoft Vision Installation
Requirements
- PC with a USB 3 plug socket
- Display with minimal resolution 1600 × 800 pixels
- Windows 10 or later (64 bit)
Download
- Sensoft Vision 2.2.zip (1300 MB)
Installation
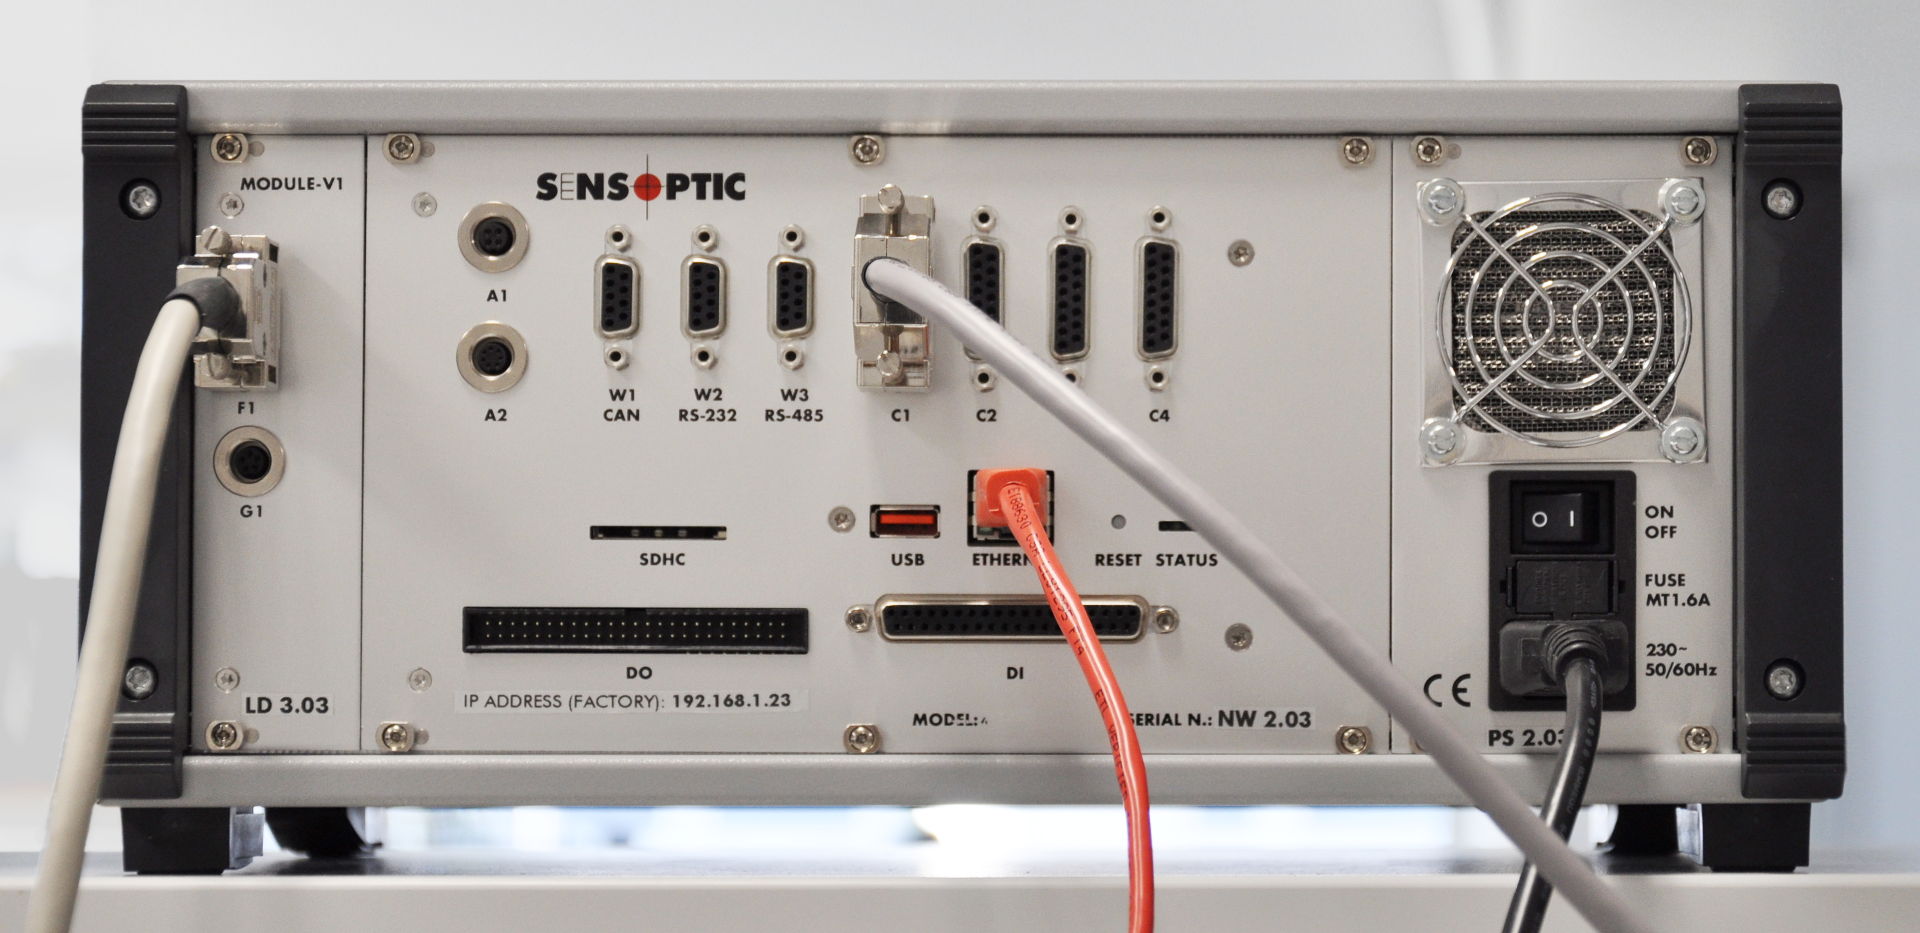
- Connecting the hardware
The sensor comes with three cables attached. The two large ones go to the Sensystem Network (connectors C1 and F1), the blue USB cable to the PC. As this last is for the camera, please ensure it is connected to a USB 3 receptacle on the PC. The Sensystem Network and the PC should be connected by an Ethernet connection, i.e. either via the LAN network or directly by an Ethernet cable. - Installing the software
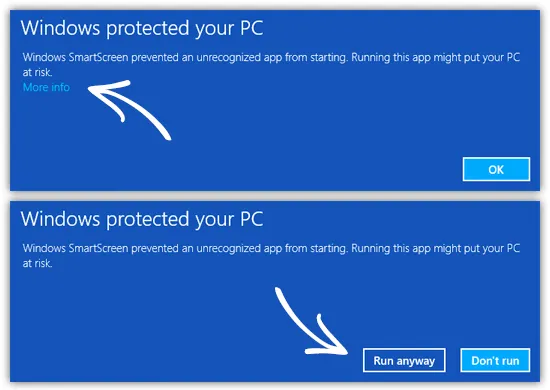
Run the installer in the zip. Note: Windows SmartScreen may show a warning when you run the installer. This is not because the installer is unsafe, but because it is not a widely downloaded file. On the warning you have to click on More info and then Run anyway - Start guide
There is a video Setup & Start Guide explaining in detail any process from installation to first measurements and a video Sensoptic Vision Software Guide explaining the main software features.
Changelog
- Sensoft Vision 2.2:
- Better reporting of the app status to OPC UA
- Sensoft Vision 2.1:
- Can run two or more Sensoft apps with OPC UA on one pc
- Sensoft Vision 2.0:
- Native 64-bit software
- AI support: Analyze photos of defects by our AI model to categorize defects and optionally eliminate fake faults
- Select faults by their properties with the new field on page Results
- You may exclude faults you consider fake from PASS/FAIL calculation
- Requires new OPC UA activation code
- Sensoft Vision 1.7:
- Digital outputs for warnings and alarms can now be pulsed, for attaching a marker. The pulses are synchronized.
- The digital output for faults, which has always been pulsed, can now be used with criteria that have length conditions and double conditions
- Digital Inputs and OPC UA can be used contemporaneously
- Sensoft Vision 1.6:
- OPC UA: Added labels Product, Order and Description. Right-click on the Spool identifier field and select Show
- Sensoft Vision 1.5:
- Advanced criteria as in Sensoft Multiline. Right-click on the Threshold field and select Use Advanced Criteria
- Sensoft Vision 1.4:
- Report with summary data of each measured spools of the day
- Vision measurements can be seen from Sensoft Multiline (in real-time and with photos) along with other lines
- Sensoft Vision 1.3:
- Support of second camera for photo of rear side of filament
- You can now add comments to noteworthy faults. In page Results, right-click the fault picture and select Add Comment. To go to the next fault that has a comment, press "c"
- The maximum value of the tacho scale is now saved to the configuration file
- Support for flat wires. You can select different diameters and thresholds for the two axes
- A warning is now displayed if an incompatible software version is running on Sensystem Network
- Sensoft Vision 1.2:
- OPC UA support. View the specifications
- Sensoft Vision 1.1:
- Velocity can be taken either from rotary encoder or manually set. To switch, click the right mouse button on the velocity field and select an entry in Velocity Source
- The field Data on page Results now optionally displays the number of faults and wire length next to the filename
- Maximum photo repetition rate increased from 16 to 24 fps