Change the IP address of a Sensystem Network box
Applies to
Sensoft Vision
Issue
How can I change the IP address of the Sensystem Network box, so that it is on the same subnet as our company LAN?
Solution
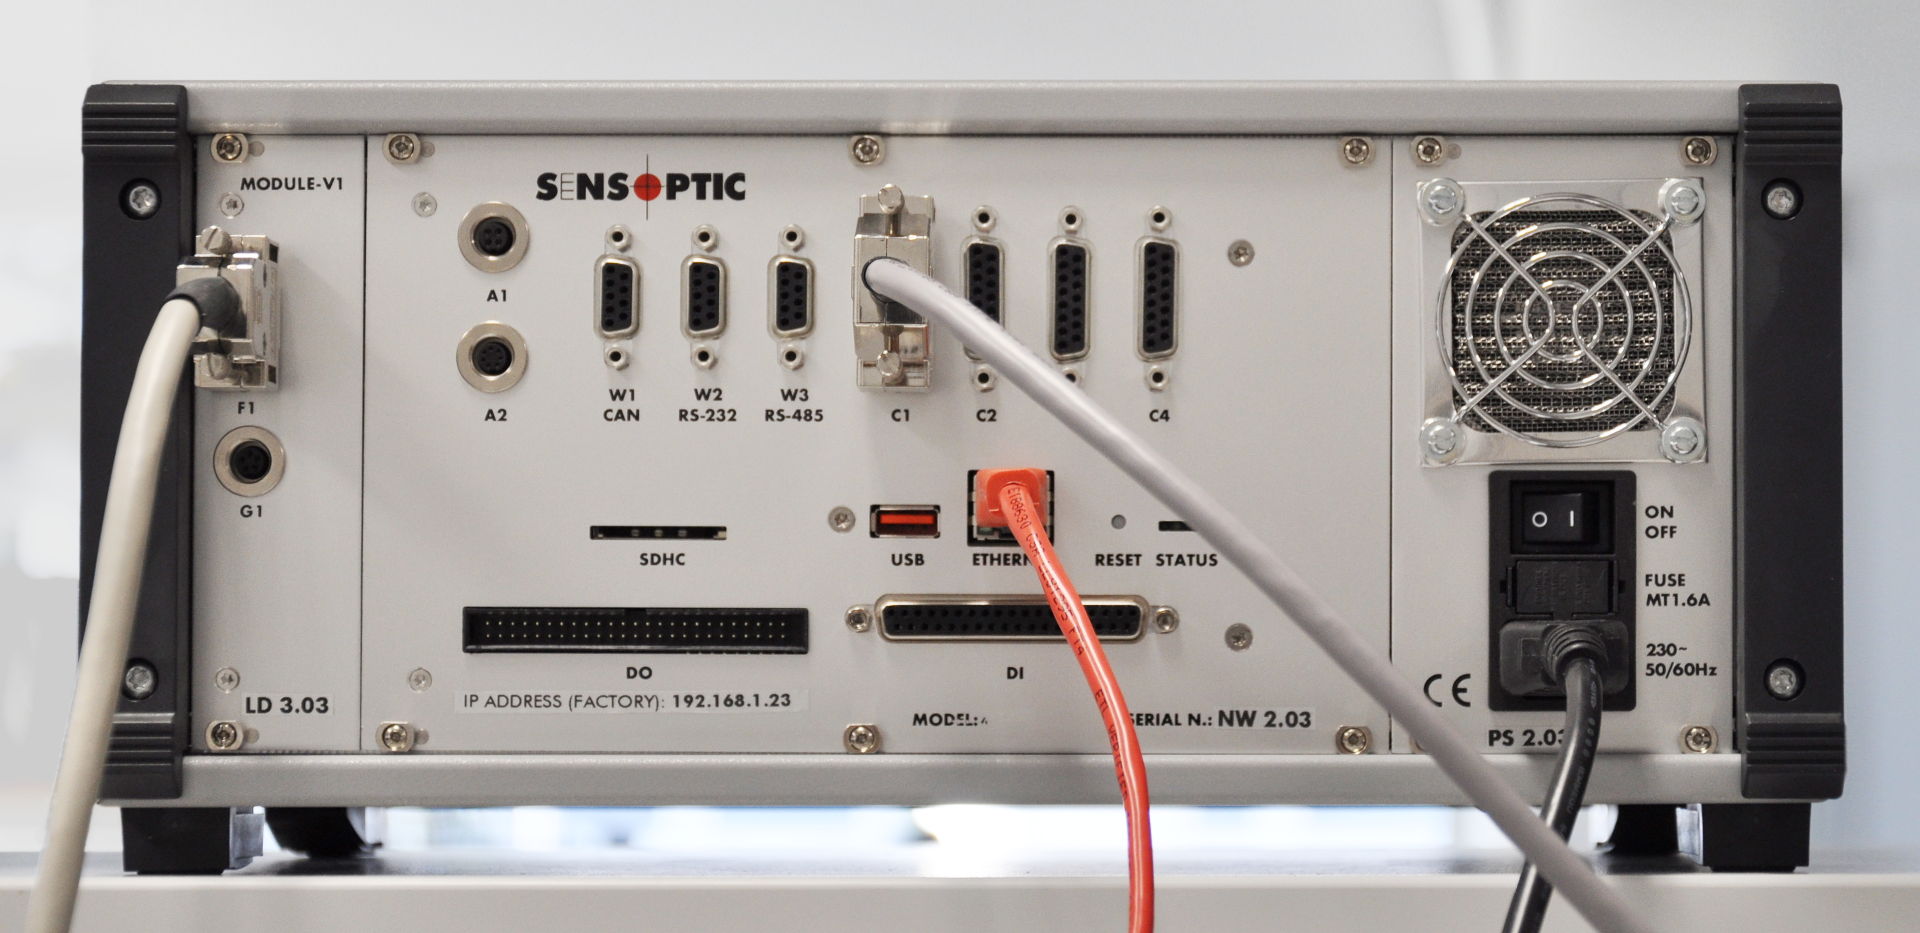
Figure 1: Back panel of the Sensystem Network (click to enlarge). The factory IP address is written in the bottom left side below the DO connector. The RESET button is located just right of the Ethernet connector, which has the red cable inserted.
The Sensystem Network is shipped with a fixed IP address in the 192.168.1.* range. This IP address is written on a label on the back panel of the Sensystem Network, see Figure 1. Let's suppose that the IP address of the Sensystem is 192.168.1.23 . Only a computer with an IP in the same subnet can communicate with the Sensystem Network. Since Sensystem Network uses the standard 255.255.255.0 subnet mask, only a computer with an IP in the 192.168.1.* range can communicate with the Sensystem.
Change the IP of the Sensystem
If your PC has an IP in the same subnet as the Sensystem (i.e. in the 192.168.1.* for a new Sensystem):
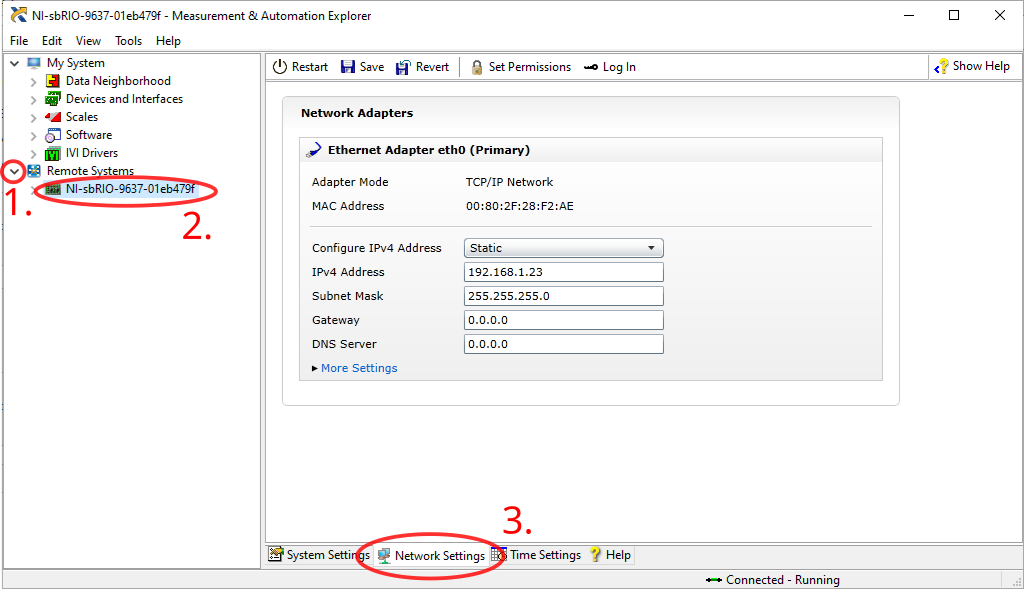
Figure 2: In NI MAX you should find your system under Remote systems. To expand the list click on the sign marked in red (1). The Sensystem appears as NI-sbRIO-9637 (2).
- Open NI MAX. To do this either select the menu entry Tools|NI Measurement & Automation Explorer... in Sensoft Vision, or click on Windows Start and type NI MAX. This is a tool by ni to communicate with their hardware.
- Find your Sensystem, as in Figure 2, and go to the tab Network Settings.
- Change the IP. We recommend to use a static IP, since the IP is stored in the Sensoft Vision settings and has to be updated at every change. At factory we set Gateway and DNS Server to 0.0.0.0, so that you can, if you wish, connect the Sensystem directly to the PC without passing through a switch.
- Save (icon in the upper part of Figure 2), and restart the Sensystem. You can close NI MAX.
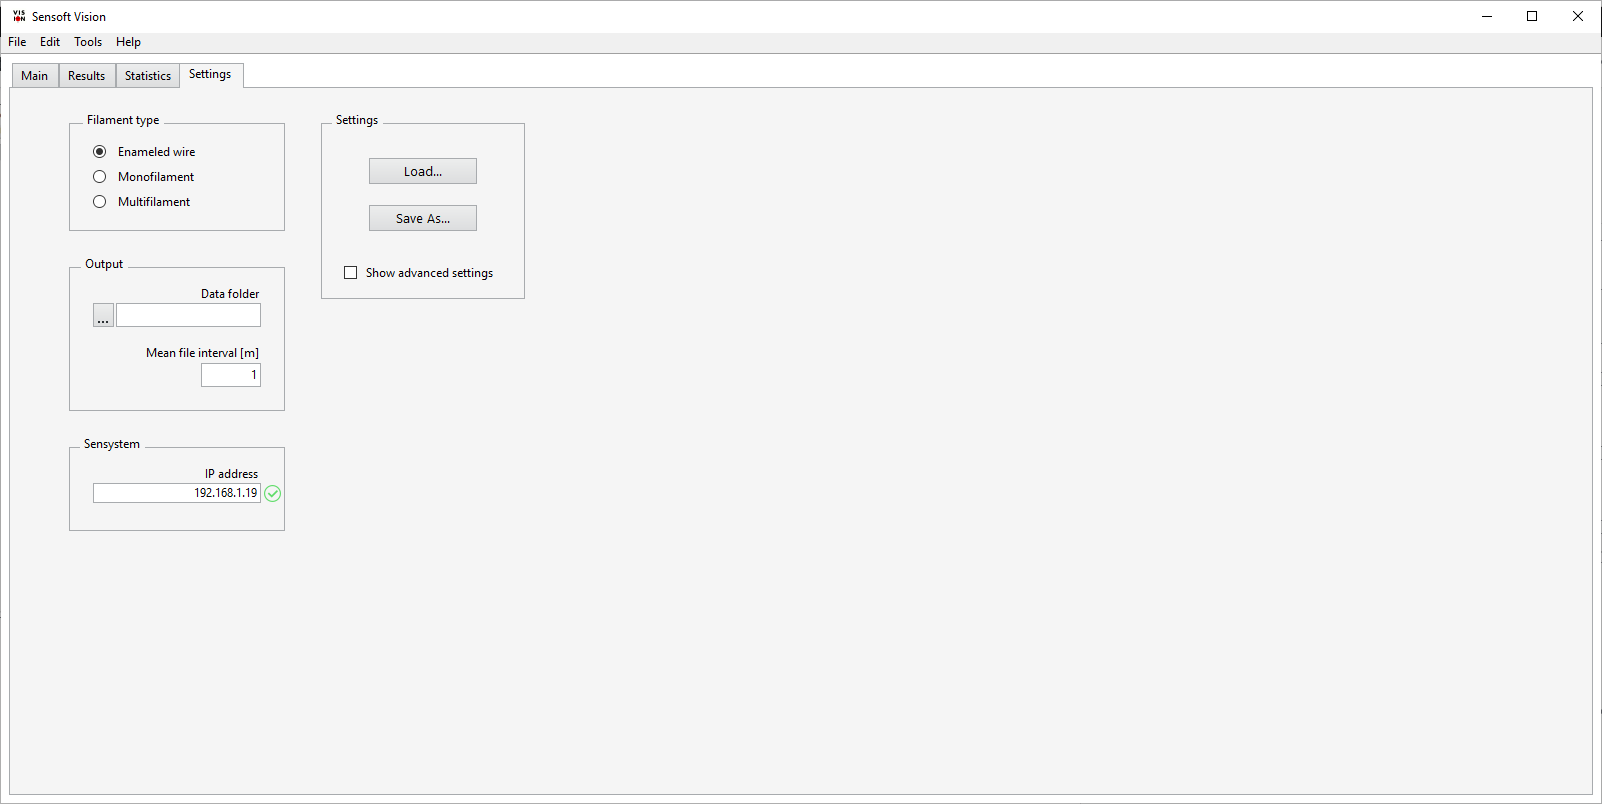
- Update the IP in Sensoft Vision. Set the new IP address on page Settings (Figure 3) and save.
If your PC is not in the same subnet as the Sensystem:
- Reset the IP settings of the Sensystem to DHCP or Link Local. To do this:

Figure 3: Setting the IP address of Sensystem in Sensoft Vision.
- Press for 5 seconds the RESET button on the back side of the Sensystem (see Figure 1). You need a tip to press it and you can check the effect on the STATUS LEDs just right of the RESET button: an orange LED will turn on. It stays on for about 20 s (while the Sensystem is booting into safe mode).
- The orange LED now flashes intermittently. Press again the RESET button for 5 seconds until the orange LED is always on again. When it flashes again the IP settings of the Sensystem are reset to DHCP.
- Restart the Sensystem, e.g. by shortly pressing the RESET button. Wait until it has booted.
- Establish the connection following this page.
- You can now set the IP of the Sensystem by following the steps 1. to 5. of the previous paragraph.