
Training a custom AI model with Sensoft
Applies to
Sensoft Vision 2.3.6 and later
Process
Training a custom AI model to classify defects on filaments with Sensoft involves the following steps:
- Define the classes
- Label the photos
- Train the model
- Evaluate the model
It thus is a project of a few man-weeks to label the photos and evaluate the model and involves costs, for Sensoptic to train and evaluate the model.
Defining the classes
Send us a list of the names of the defect types. The typical number of classes ranges between 5 and 10. The classes of the standard model for categorizing defects of enameled wires are: Lump, Irregular enamel, Mosquito, Hair, Dust, Uncertain. The class Uncertain must always be present, and is for features that you or the AI model cannot assign to another class.
Please tell us also which classes correspond to real defects and which to fake defects. Fake defects are those that are problem to the quality of the wire and you will have the option to omit from counting and marking. The class Uncertain is always considered as real. Of the standard classes typically Lump, Irregular enamel and Mosquito are considered real defects, while Hair and Dust fake ones. We recommend to keep Hair and Dust because hairlike and non-hairlike dirt is so ubiquitous. Dust in the standard model also includes small enamel pieces that fall onto the wire. If you add classes keep in mind that the visual aspect of the features should be different from the other classes.
Labeling
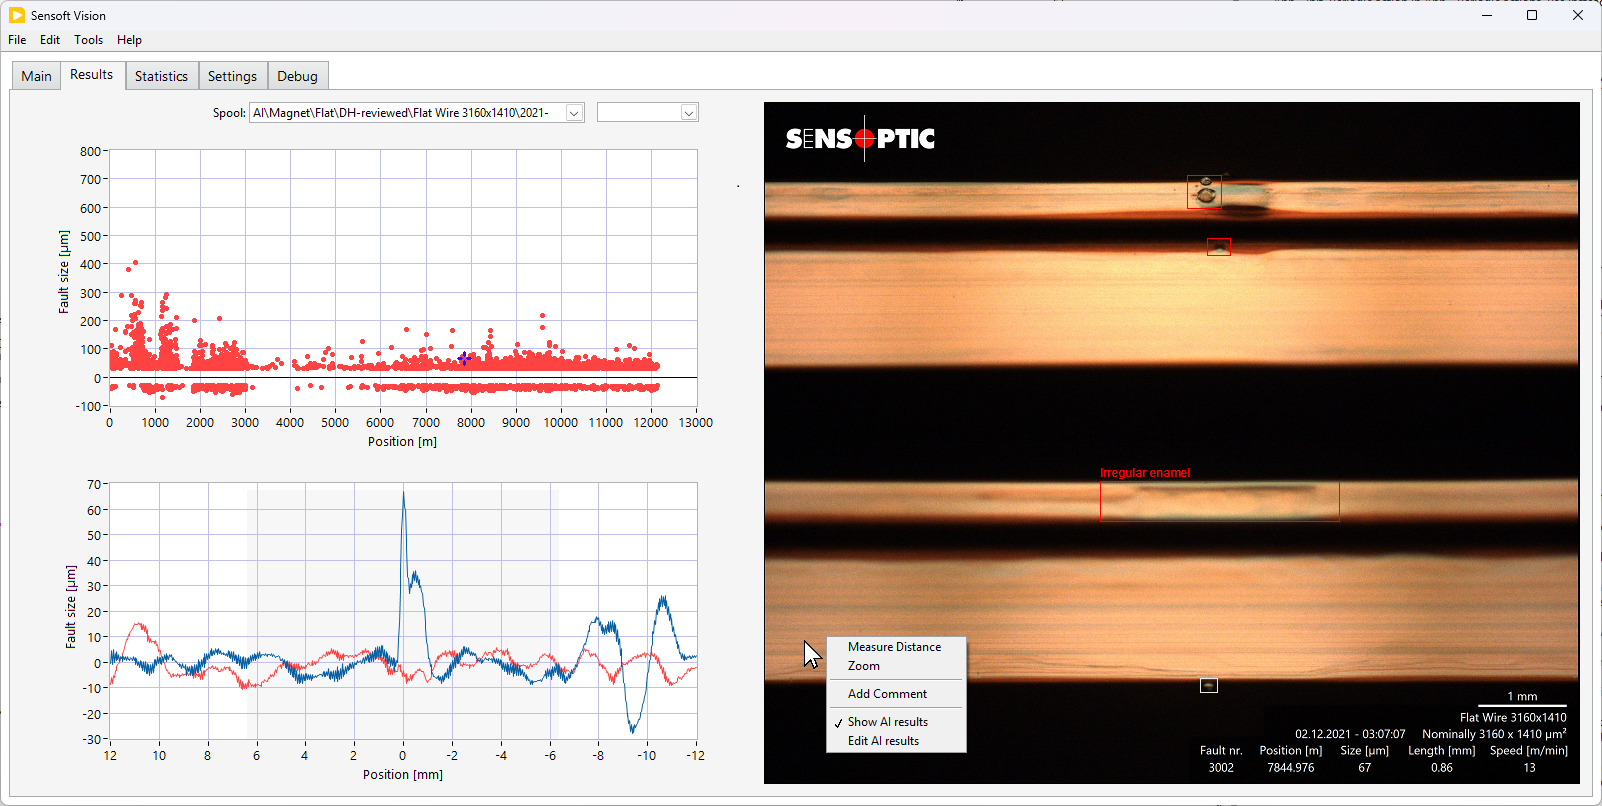
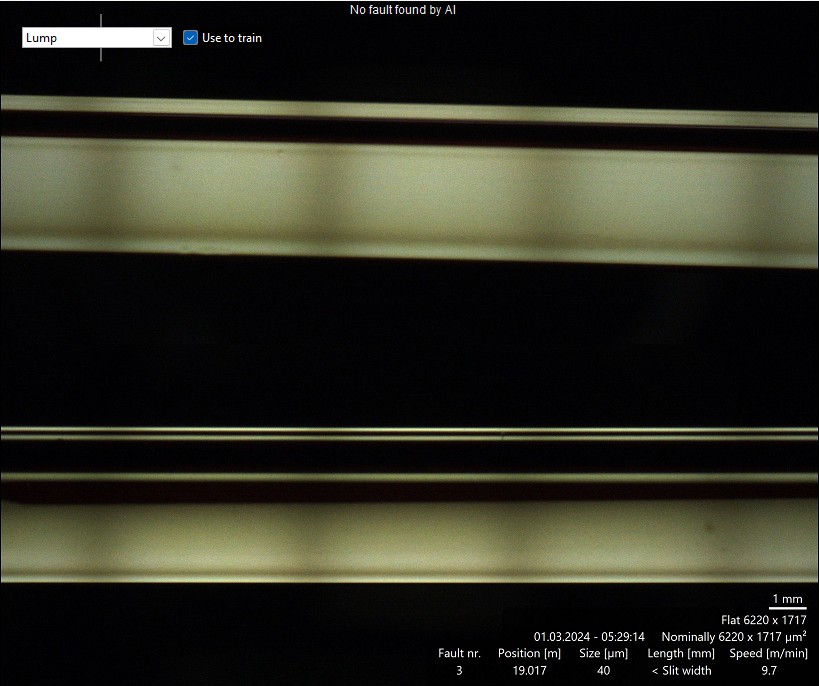
You can label photos for training directly in Sensoft. To label, AI has to be active. You can then click with the right mouse button on the photo on page Results and activate the Edit AI results entry from the context menu, see Figure 1. The bounding boxes inferred from the AI model will turn to a dashed line, solid line is now for the bounding boxes of your labels, the Ground Truth (GT) in technical speech. Top left on the photo two fields appear, as shown in Figure 2. The field Use to train indicates whether the current photo will be used to train the model. The drop-down list indicates the class of the selected bounding box.
To create a new bounding box, simply draw a new rectangle by dragging (clicking on a free spot and moving the mouse holding down the mouse button). The field Use to train is automatically set to True, if it was not already. If the inferred AI results (the dashed bounding boxes) are pretty good, you can also start with them by clicking on the Use to train field to activate it. They will change to solid lines and you can correct them. To change the size of a bounding box, select it by clicking on it, and drag one of the corner handles (little squares) that appear. To change its class use the drop-down list, or press the L key for Lump, D for Dust, H for Hair or U for Uncertain. To delete a bounding box, select it and press the Delete key.
Start the labeling operation when reviewing the AI results. When the AI is more or less correct, you can go to the next photo (by scrolling the mouse wheel over the photo or by pressing the Right key) without making any changes to the bounding boxes. The Use to train field will remain without checkmark, we don't want to train the AI model on photos it is already good at. If in contrary the AI results are not good, click on Use to train and correct the bounding boxes. We recommend to label clear cases and not to label too complex cases (like e.g. Figure 3 with plenty of small blisters).
When you start editing the bounding boxes, the dashed ones disappear, to remove clutter while editing. To see them again, just click on the photo (if there is no GT bounding box selected, you see the Pred ones, the ones inferred by the AI model). If you never want the Pred ones shown, click with the right mouse button on the photo and deselect Show AI results.
The GT labels are stored in a JSON file accompanying each labeled photo: a human readable text file with the same filename as the photo, but with extension "json". In Sensoft Vision you can select all labeled faults of a spool by writing json in the Select faults field. For finding the unlabeled ones, use not json. There are many other useful search terms, like Lump to find the faults the AI models infers as with a lump, Lump in GT to find the faults on which you labeled a lump, or Fake and not Fake in GT finds real faults the AI model wrongly qualifies as fake.
|
Figure 1: Bounding boxes highlight the defect features found by the AI model in the photo. You can toggle the highlighting by clicking on the photo with the right mouse button. |
Figure 2: Three defects barely visible behind wire |
Figure 3: Many small blisters. Not ideal for training, since hard to label and many edge cases. |


How to label well
- It is important to label consistently. If in doubt, do not include the photo in the training set.
- If you don't know into which class to include some rare feature, consider first if it is a real (i.e. that affects quality, that should be marked) or a fake thing. Put a real feature into a real class, for such cases often
Uncertain. For a fake feature use a class of fake defects, or consider not to label it, i.e. not to draw any bounding box around it. - If a photo has multiple features, label them all. For example, hairs are often visible twice.
- Correct border around the feature. When drawing the bounding box, leave some space around the feature. For how much, please orient yourself from the bounding boxes predicted by the AI model (it's around 15 px for larger features and a bit less for smaller ones, because it is advantageous if the feature occupies as much as possible of the bounding box). Leave the same space in the four directions. During training the AI model is rewarded if their predictions are near to your labels. Tip: if the AI model recognized the defect and you agree with its bounding box, you can press Ctrl - B. This command adapts the selected bounding box to the bounding box of the AI model (if there is one, of the same type around that defect).
- One or many bounding boxes around nearby features? Group features of the same type if (and only if) the bounding boxes overlap. Surprisingly often a bounding box around what appears to us as a defect cluster has to be split, because the bounding boxes effectively don't overlap.
- Use the zoom (Ctrl + Scroll wheel) to set the bounding box precisely.
- Edge cases: There will be plenty, since there are many smooth transitions from an evident defect to something clearly innocuous. A blister can get smaller and smaller without a clear boundary, a drop can get less and less liquid until it sticks firmly on the enamel, dust can get to big or sticky to ignore. Be consistent also in the edge cases. In our standards model we classify normal blisters as Lump. Very small blisters, perhaps 10 microns in height and thus less clearly identifiable on the photo we classify as Uncertain. Even smaller blisters we omit entirely. Try to do the same. The model is trained to be meticulous at not missing faults, so even a few GT labels of very small features will lead to many small feature predictions.
- If near a defect there is a very small defect (that you would not label if it was on its own), do not enlarge the bounding box of the large defect to include it.
- Sometimes defects are barely visible because behind the filament, as in Figure 2. Marking such defects on the one hand helps the model recognize more defects, on the other hand leads the model to have more ghost predictions. Therefore there is a threshold in defect visibility, below which one should not mark defects any more. Figure 2 represents more or less this threshold.
- Include also some photos (perhaps 1% to 5%) where no defect feature is visible, as in Figure 4.
- Label all defects of rare classes, like Mosquito. The model learns easier if no class is much rarer than the others.
- The total number of images to label depends much on the variability of the defects. Try to label at least 100 images in each class. More is better, up to perhaps 5000 images per class. The standard wire model is trained on about 6000 images, which can be added to yours, if your model is also for enameled wires.
Training the model
Before sending us the training set, please test you labels for lapses. You can do this with a tool included in Sensoft Vision, that you call by the menu command Tools ▶ Custom AI Model ▶ Export Snippet of Every Labeled Defect... . It will create a snippet of what is inside every bounding box, and stores them separated by class, see Figure 5. You can then look at them using the normal File Explorer (with view set to Large icons) to find suspicious ones. If you find a suspicious one, copy the file name, and paste it into the Select faults field. It will search all spools, load the containing one, and go to the specific fault. You can then examine it and correct it.
|
Figure 4: If possible, include also some images with no visible defect and no label. |
Figure 5: Snippets of all lumps in the training set, created by an included tool. |

When the training set is ready, send it to us using the menu command Tools ▶ Custom AI Model ▶ Prepare for Custom AI Training... . It will collect the training data, compress it to a zip file and prepare it to be sent to us, best to Daniel Haertle (d.haertle@sensoptic.ch), via SwissTransfer or any other transfer service of your choice.
Evaluate the model
We will send you back a link to an improved AI model. The zip file contains the AI model file Sensoptic AI.exe, which you can extract and copy to C:\Program Files\Sensoptic\AI replacing the old model file. This a) needs admin privileges and b) requires the old model not be running. If the old AI model is running you get an error saying that the program is running in another application. In that case you should use the Task Manager to find Sensoptic AI.exe under Background processes and end the task.
We will discuss together performance metrics of the new model with your data. You can of course also browse through your spools with Sensoft Vision. If you want to test the performance on the training set, I recommend to use the Select faults field to select the labeled faults by writing json in it, see above. I also recommend to have a validation set: a set of photos that you did not send us, that you use to test the new model. The best is if they are labeled, so that the comparison is more objective. In Select faults you can append in GT to any AI category to look for it in the Ground Truth data (your labels) instead of the prediction of the model. Therefore lump in gt finds the faults with a Lump bounding box in your labels, and Fake and not Fake in GT finds real faults the AI model wrongly qualifies as fake.
Sensoptic will provide evaluation results of the model on your photos. This includes the two main figure of merits:
- Real recall: Percentage of real faults the model recognizes as such. One minus Real recall is the percentage of real faults you loose when trusting the model.
- Fake recall: Percentage of fake faults the model recognizes as such. Fake recall is the percentage of avoidable scrap you avoid when trusting the model.
The evaluation results also include tools for advanced inspection. You get a list of the prediction results for every photo you provide. This permits e.g. to find the faults incorrectly recognized as fake. If you want to go to such a fault in Sensoft Vision, copy the fault name (e.g. 2024-02-29T08_33_15 Fault 33) and paste it in the Select faults field. This permits you to visually compare the predicted bounding boxes to your ground truth bounding boxes.